Today's guest post comes from the ultra adorable
Devan of Nimbi Designs! She is a very talented designer and graphic artist, but really I see her as a J
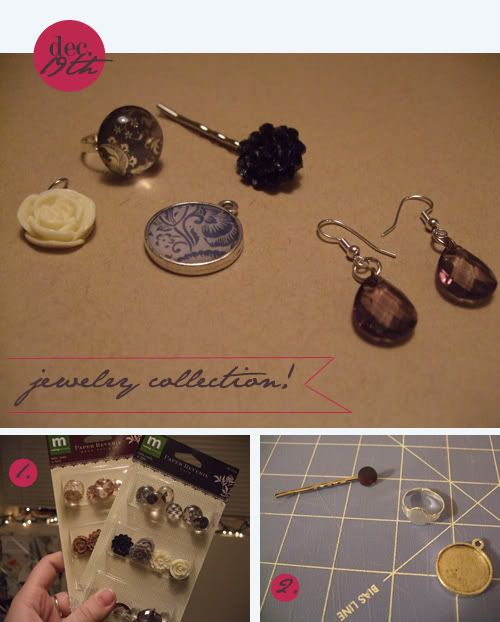
ill of all trades. Here is just one example of that: a jewelry collection set to wrap up for someone special or wear to that next holiday party. I will let Devan take it from here ;)
For this project you will need these tools: diamond glaze (clear drying liquid adhesive), scissors, decorative paper, (no 1.)
Making Memories “Paper Reverie” 18 pc set (comes in several color options, for this I used “Noir”, runs about $5 for a set), (no 2.) Necklace backing, Silver hoops for necklace making, Silver Blank ring, Silver blank double sided necklace piece, Silver Earring piece pair, Pliers, Disposable paint brush. (grab all of these at your closest craft shop!)

step 1 + 2. Take your bobby pin piece and add a little bit of Diamond Glaze on the flat silver part of the bobby pin with your disposable paint brush.
step 3: Then take your chosen piece, in mine I picked the black sparkly flower, and place the Diamond Glazed piece to the flat side of the plastic rose. Let it sit and dry. Should only take a hour or two to dry since it’s a lighter amount of Diamond Glaze.
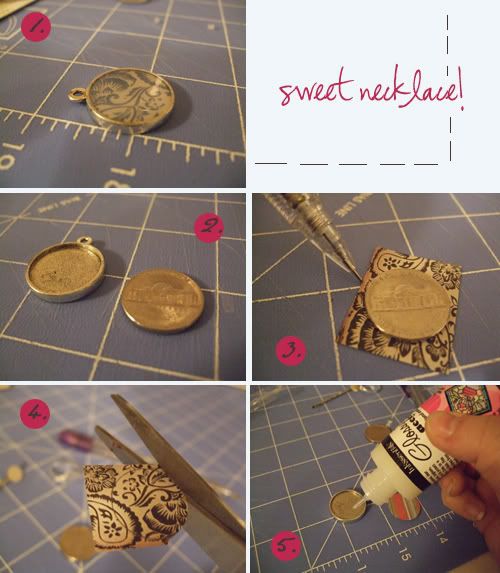
tep 1. the pendant when it's all finished up!
step 2. For this necklace (about nickel size) I chose a paper that matched the “Noir” collection to cut out and place inside the Double-Sided necklace
step 3. To get the right size I took a nickel and placed it on a the paper, and drew with a pencil lightly tracing the shape and size of the nickel
step 4. Once you’ve traced the shape out, take your scissors and cut along the line.
step 5. Then I take the Diamond Glaze and put just a small pea sized drop inside the Silver piece -- I use my disposable paint brush to evenly spread the glaze around. Once it’s set poor a little bit of the Diamond Glaze inside filling and covering evenly over the paper design. This will take about 12-24 hours to dry fully so sit it aside until the Diamond glaze has hardened and turned clear.
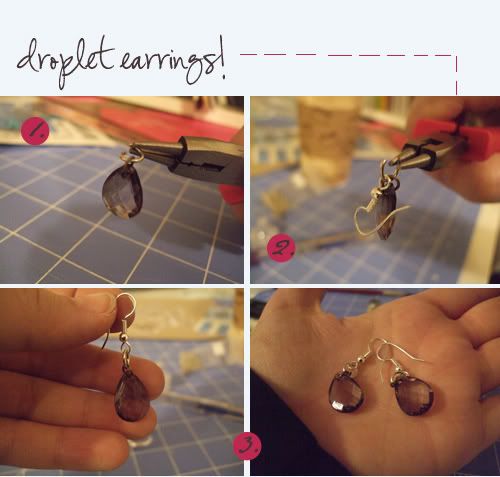
step 1. I chose 2 of the black jewels and replaced the hoops on them with larger silver hoops to match my silver earring pieces. Use your pliers to remove and add these.
step 2: Once you’ve done that, add your earring piece, and close the hoops tightly, so that it doesn’t have a gap to fall out.
step 3: Your earring is done. Do the same for your other earring and they are ready to wear.
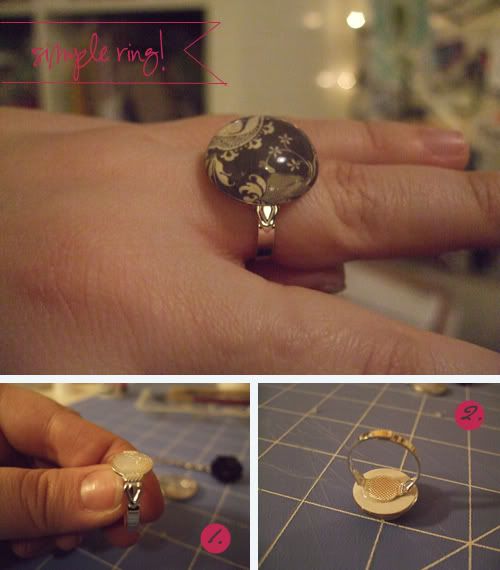
step 1. Take your silver ring piece, and just like you did for the Bobby Pin, use your disposable paintbrush to add diamond glaze to the flat part of your ring.
step 2: Add your chosen piece for your ring and let it sit again, for at least 1 to 2 hours.
Now you’ve made an entire little accessory set as a gift -- you can give them individually or as a fun set. The best part is you have several other pieces to use and make many more from. Perfect girlie gift for the holiday season and great for a New Years Eve wear. Have fun making your pieces and Happy Holidays! – Nimbi Design
Thanks for reading my super fun guest post! I have been looking forward to having her here :) I have one more guest post coming up in a few days filled with vibrant colors! And don't miss tomorrow's post: feather hair accessories.


gorgeous! Love the bobby pins :-D
ReplyDelete