


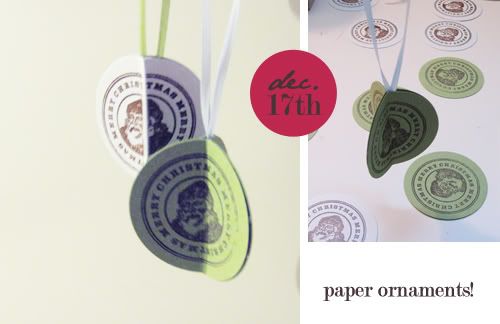
There are more then many ways to make paper ornaments, but these are 3D!
Once you get the hang of these you can whip them up in no time, and they are kid friendly!
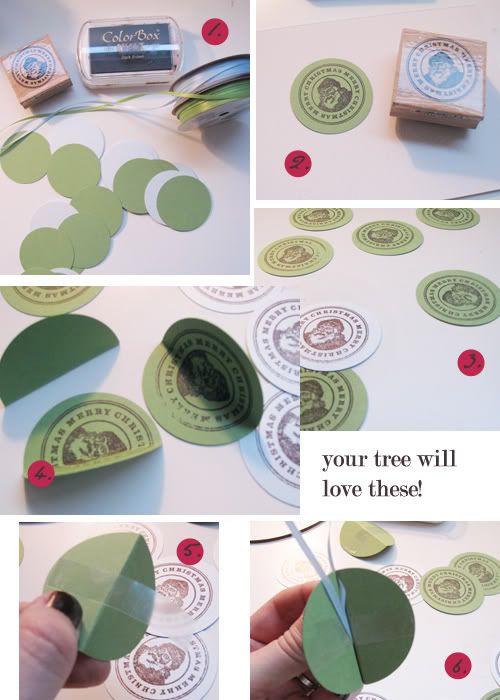
step 1: You will need these materials- cardstock cut into a shape you like (I chose 2" circles to match the circle stamp), a decorative stamp, stamp ink, double sided tape, scissors and ribbon.
step 2: Stamp your cut paper. Like in the previous post I prefer dye ink for fast drying. You only need to stamp one side.
step 3: Let your pieces dry if they need to.
step 4: Fold your shapes in half. I used a bone folder to place a score line in the middle to make it easier to fold. If you don't have one you can also use the dull side of a butter knife.
step 5: Place a small strip of double sided tape on the back of your scored shapes.
step 6: Tape two pieces together, then before placing the third cut 12" of ribbon. Loop it and attach the ends to the tape inside the ornament. Finish off with the third piece of cardstock to hold your ribbon in place. Hang them up!
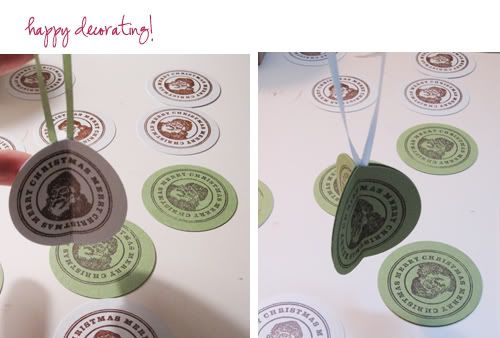
Our tree is filled with little handmade ornaments, it makes it just a bit more personal. Don't miss tomorrow's post: knitted coffee sleeves! (<--I have been can't waiting to share this one!)


No comments:
Post a Comment